
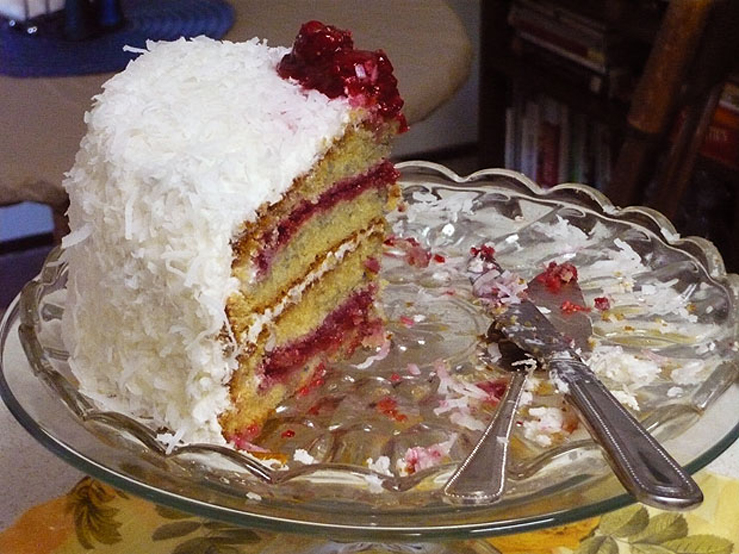
This was the cake I made for my little Mother’s Day get-together. I didn’t do well in planning the photographs of this cake. I was to caught up in playing hostess (as in party thrower, not commercial baker) to get proper blog pics… but at least the cake tasted good and everyone seemed to enjoy it. Personally I thought it would be better with more frosting but the general feedback was that it was the right amount of sweet to tart and I’m the kind of person that eats giant spoonfuls of frosting.
Ingredients
Cake
- 2 1/2c/325g all purpose flour
- 2 tsp baking powder
- 1/2 tsp baking soda
- 1/2 tsp salt
- 1c/225g unsalted butter, at room temperature
- 1 3/4c/350g granulated white sugar
- 4 large eggs, at room temperature
- 1/2 tsp vanilla extract
- 1/4 tsp coconut extract
- 8oz/240 ml coconut milk mixed with 4 TBSP buttermilk powder
Filling
- 1 pint of fresh raspberries, 6 to 8 of the best ones set aside for decorating the top
- 3c/340g fresh or frozen (defrosted) raspberries
- 1c/220g sugar
- 1 TBSP lemon juice
- 1 tsp butter
- 4 TBSP cornstarch mixed with 2 TBSP water
Frosting
- 1/2c/115g unsalted butter, softened
- 1/2c/100g vegetable shortening
- 1/2 tsp vanilla extract
- 1/2 tsp coconut extract
- 3c/375g confectioners’ sugar, sifted
- 2 TBSP coconut milk
- 12oz/340g sweetened coconut shreds, divided
Instructions
This cake is simple to make but takes a few hours from start to finish, so make sure you give yourself enough time if you are making this for a special occasion. I made this cake the day before serving it and the raspberry filling sunk into the cake in a pleasant way so that is definitely an option.
Cake
- Pre-heat the oven to 350f/180c, grease and line two 9″/20cm round cake pans.
- In a medium bowl, sift together the flour, baking powder, baking soda, and salt. Set aside.
- In a large mixing bowl, beat the butter for a minute or two until soft.
- Add the sugar slowly, then beat for 2 to 4 minutes, or until light and fluffy.
- Add eggs one at a time, beating well after each addition. Add the vanilla & coconut extracts with the last egg.
NOTE: If the mixture looks a little curdled, don’t panic. It will come together after the last of the ingredients are mixed in.
- Add the flour mixture in 4 addtions and the coconut milk mixture in 3 addtions, beginning and ending with the flour.
- Evenly divide the batter into the prepared pans and smooth over the tops.
- Bake for 30 minutes in the center of the oven, a toothpick inserted into the center of the cake should come out clean when the cake is done.
- Cool the cakes for 10 minutes, then turn out onto on wire racks to cool completely.
Filling
- In a saucepan, whisk together the raspberries, sugar and lemon juice.
- Heat over medium high heat until it just starts to boil, whisking occationally.
- Once the mixture begins to boil, remove from the heat and whisk in the water & cornstarch mixture.
- Return to the heat, whisking constantly bring the mixture back to boiling and cook for two minutes.
- Remove from the heat and pour through a mesh sieve into a heat-proof bowl to remove the seeds.
- Leave to cool to room temperature.
Frosting
- Add the sugar all at once, then mix slowly at first, scraping down the sides of the bowl.
- Once the sugar is moistened, beat until the mixture appears crumbly.
- Beat in the coconut milk and extracts, continue to beat until the frosting is smooth.
- Add in half the shredded coconut and beat until just combined.
- Scrape up the sides and bottom of the bowl and pile up the frosting in the center.
- Cover the bowl with a damp kitchen paper towel until needed.
Putting It All Together
- Once the cakes have cooled completely, split each of them into two layers.
- Working with one split layer at a time, pipe a 1/2″ circle of the buttercream frosting around the outside of the bottom layer and scatter half the fresh raspberries over.
- Spoon over 1/3 of the raspberry filling and then put on the top layer and press gently around the outside to seal it.
- Repeat with the other split layer.
- Place one of the split and filled layers on a serving plate and then frost the top with 1/3 of the buttercream.
- Place the other split and filled layer on top and press the edges gently.
- Frost the sides and top of the cake with the remaining buttercream.
- Press the rest of the coconut shreds into the sides and top of the cake.
- Drizzle a little of the raspberry filling over the reserved fresh raspberries and place in the middle of the cake.
- Serve any leftover raspberry filling on the side as a sauce.
 Makes one giant 9″/20cm cake – Serves 12 to 16
Other Notes
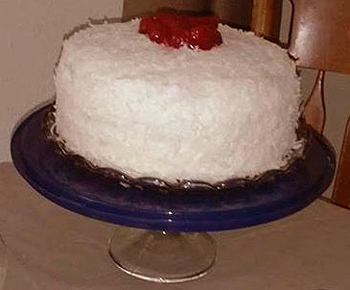
- The picture to the right was taken pre-slicing/serving but I took it with my phone.
- Like I mentioned in the introduction, I’d like more frosting on this. I’d doubled it next time and make the top and center layers much thicker.
- The raspberry filling is not like jam, it’s more like a thick sauce and it is supposed to be tart!
- If you make this cake the day before you want to serve it, you should wait to top it with the reserved raspberries.
- I served this and told no one that there was extra raspberry filling, mwaahahahahahahah!
Other Posts You Might Like...
Comfort food can be a very simple thing, such as a cupcake from a bakery. It can also be a labor...
I love this stuff and I can eat tons of it! As an appetizer dipped in hot mustard, in chow/low m...
When it comes to relatively guilt free cake, Angel Food has got to be a number one contender. It...