
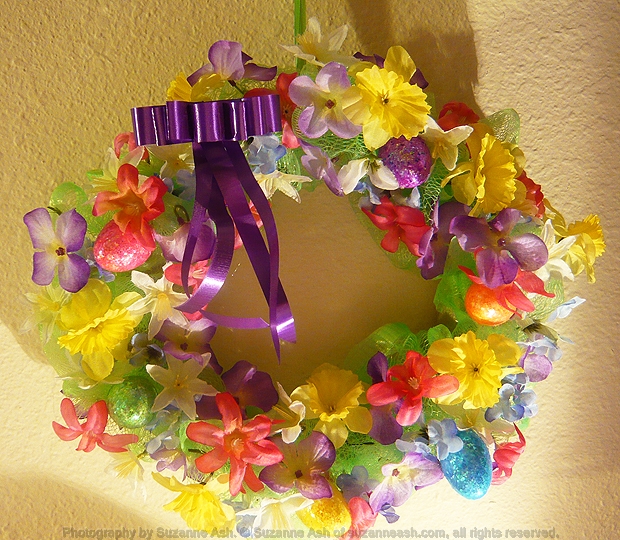
My Granddaughter and I made some inexpensive, cute & easy to do wreaths for Easter. You could just leave off the parts that make it “Eastery” and have it as a spring wreath too. I already had a few of the things we needed, and I ended up spending just under $10 on stuff specifically for this project and we each got our own wreath out of it.
 We went to the dollar store (specifically DollarTree) and got…
- 1 bag of glitter covered decorative eggs (12 per pack)
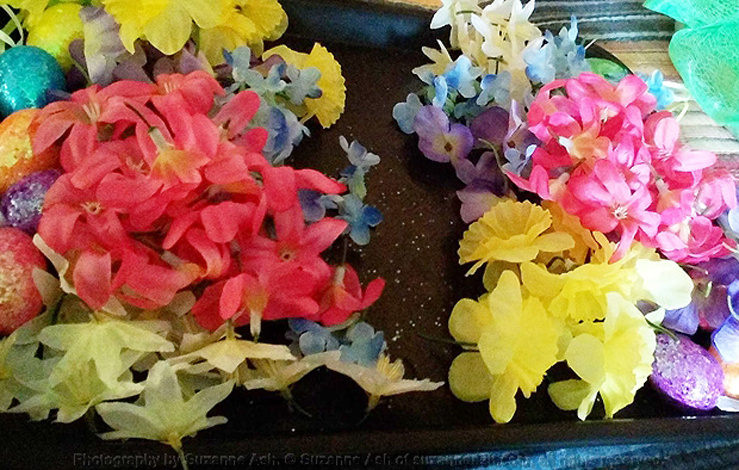
- 5 bunches of fake spring flowers
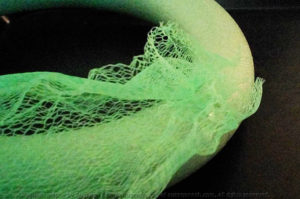
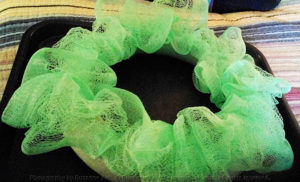
- 2 florist’s green foam wreaths
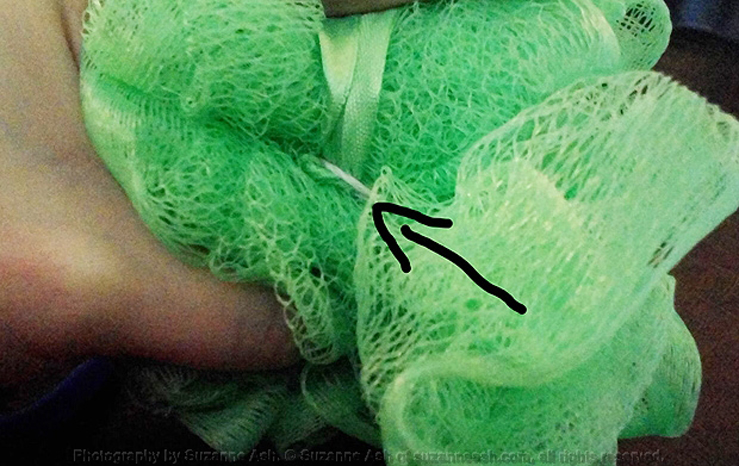
- 1 green body wash/bath scrubby thing
We also used scissors, hot glue/gun, PVA craft glue, some ribbon and the end of a cheap craft paint brush.
To prepare our materials, we cut off all the flowers from the stems, leaving just a little of the stem on each and we cut all the hanging ribbon off the glitter eggs.
Then, I located the string holding the bath scrubby together and cut it. Then I cut the loose scrubby into two equal halves.
Because hot glue is, well… hot, I used the glue gun to attach one of the scrubby halves to each of the florist’s wreaths and gave one to my granddaughter.
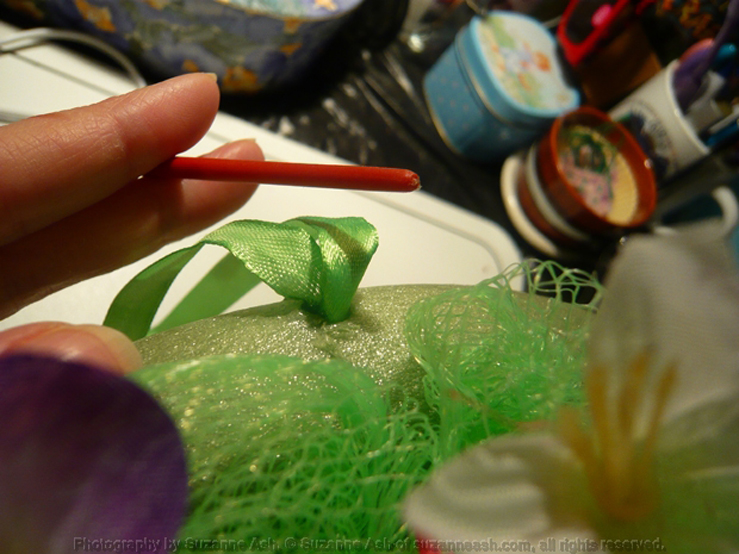
I poked a hole at the top of my wreath and hot glued the hanging ribbon from the scrubby into it, my granddaughter tied a ribbon around the top of hers.
We then both glued the flowers on randomly all over the scrubby that was stuck to the wreath. I used hot glue and she used PVA glue. Both worked well, but because hers needed a while to dry she took it home before it was finished so I don’t have a picture.
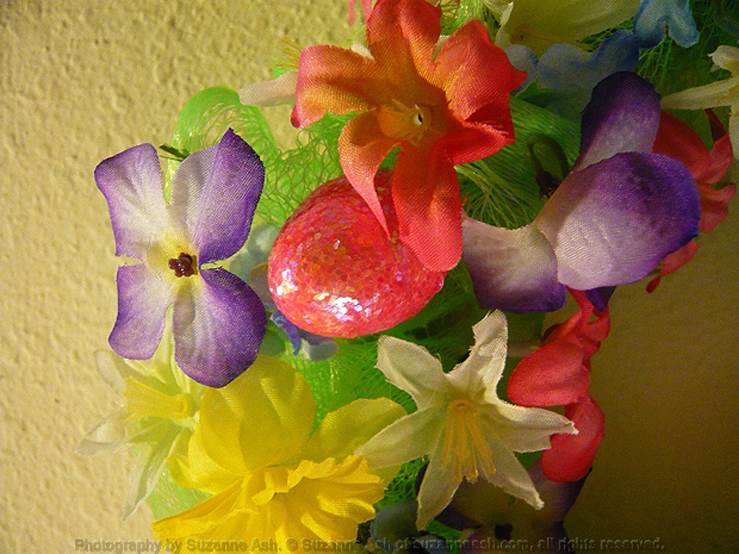
I finished mine by gluing the glitter eggs to the wreath amongst the flowers, leaving a small space off center at the top for a bow.
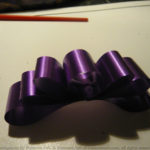
This is how I made the bow for my wreath…
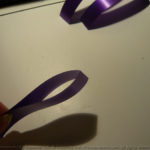
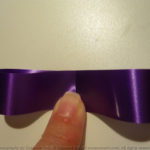
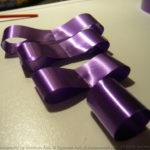
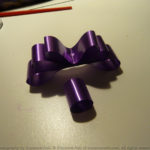
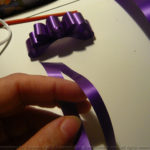
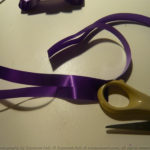
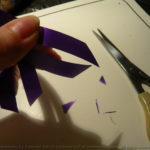
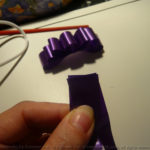
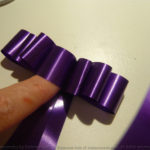
I wanted my ribbon to have 3 loops on either side, so I measured how long I wanted my ribbon to be, then I measured some ribbon (the kind you finish gift wrapping with) to be twice the length I wanted. Then I cut another piece 3 pieces, each 1 inch smaller than the last piece I cut. I also cut two “tail” pieces to finish off the ribbon. I then folded the pieces of ribbon to get the exact center and then turned them over and glued them down. Then I glued all the top part of the ribbon pieces together going the same way, except the top piece that I turned so that the loop was parallel. I cut each tail piece in half and left about half an inch at the top, then I used the old “pull the ribbon over the scissors” trick on a few areas of the ribbon to make the tail a little curly. I then glued the two pieces together at a slight angle before gluing them to the back of the loops of the ribbon to finish it off. Then I glued it to the wreath.
   |
   |
   |
   |
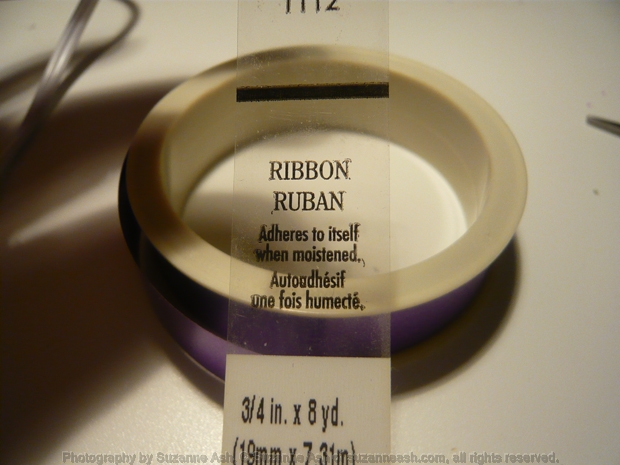
Did you know that some ribbon will stick to itself if you wet it? The ribbon I used was Hallmark brand and it did indeed stick to itself when I rubbed a little water on it, though it wasn’t strong enough to hold the ribbon together for my purposes so I used hot glue instead.
Other Posts You Might Like...
My granddaughter and I made these easy (but with a lot of steps) mobiles just for fun. No special ...
This was an easy and fun little project that I did with my granddaughter Alex. It cost around $10,...
Are you a Whovian? Have you been watching for 50 years or just since the revival? Which Doctor is ...