
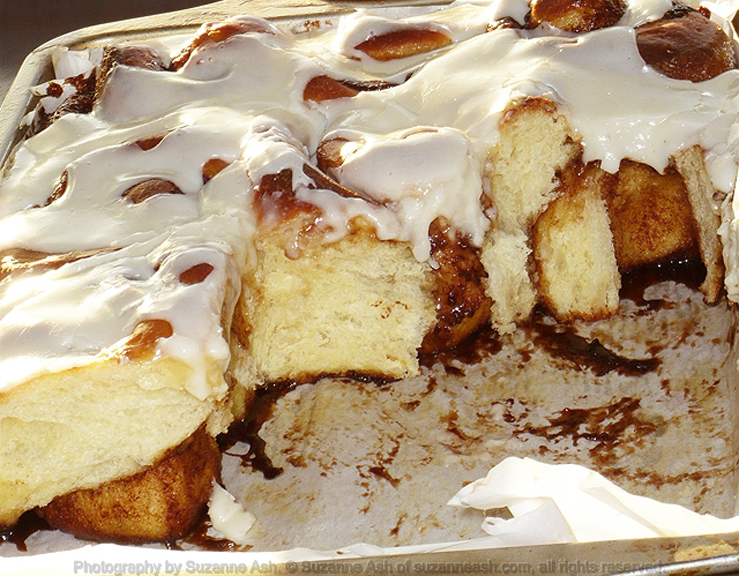
These totally homemade cinnamon rolls are really easy to make and a whole lot nicer than the “canned” ones! I use a breadmaker to do the bulk of the hard work. Really, why knock yourself out if you don’t have to? In fact, I use the breadmaker for all yeast bread, I just don’t bake the dough in the breadmaker. Plus, these rolls have their second rise in the fridge so you can make them the night before and in the morning just put them in the oven and half an hour later… BAM you got lovely fresh homemade cinnamon rolls!
Ingredients
For the dough
- 1c milk (I use 2%)
- 1/3c butter, cut into small cubes
- 1/2c granulated white sugar
- 2 1/2 tsp fast acting yeast (.25 ounce)
- 3 large eggs
- 1 tsp salt
- 4 1/2 cups unbleached all-purpose flour, plus extra for rolling
For the filling
- 1/2c margarine at room temperature
- 3/4c brown sugar (packed)
- 1 rounded tsp of ground cinnamon
For the icing
- 2 TBSP cream cheese, at room temperature
- 2 TBSP milk
- 1/2 tsp vanilla extract
- 1 tsp corn syrup
- 1 1/2c powdered sugar
Instructions
- Heat the milk for 1 minute in a large microwavable measuring jug or bowl, the milk should be very warm but not hot.
- Add the cubes of butter and the sugar and whisk until the butter is completely melted and the sugar is dissolved.
- Gently whisk the yeast into the milk mixture and leave to prove for about 5 minutes, or until foamy/creamy looking.
- Meanwhile, crack the 3 eggs into the breadmaker, add the salt and then the flour.
- Set the breadmaker to the dough cycle, add the proved yeast and milk mixture and start the machine.
- Once the breadmaker is going, make the filling and the icing and prepare the pan.
- Mix up the filling ingredients. It’s best to beat it well with an electric mixer until it is well combined and soft. Then set it aside at room temperature.
- To make the icing, put the powdered sugar in a deep mixing bowl and make a well in the center. Add the rest of the ingredients and mix by hand with a spoon until the sugar is moistened. Then beat when an electric mixer until smooth. Pour into a zip-lock bag and refrigerate until needed.
- Lightly butter a 9″x13″ baking tin, then line with parchment paper and butter the paper. Cut the paper so that it fits the tin with little to no hangover. Set aside until needed.
- When the dough is ready, tip it out onto a well-floured surface. The dough will be a little sticky and elastic. Just flour the top and flip it over.
- Aim for a 14″x12″ rectangle, but don’t expect to achieve it. Just do the best you can do approximate the size and shape. You should end up with the long end closest to you and the short sides to your left and right.
- Spread the filling out gently over the dough, all the way to 3 of the sides and leave an inch uncovered at the top. Wet the inch of uncovered dough with water (just your fingers!) and roll up starting from the long filling to the edge side (this should be the closest edge to you). Roll slowly and get it as tight as you can.
- Once it is rolled and sealed, turn the rolled dough seam side down and even it out by running your hands along it. Then using both hands on either end of the roll, push in so that the roll is about 12″ long.
- You can try to cut it with a knife, but I think the best way is to use dental floss. You just cut off a long piece of the floss, slide it under the roll and then bring it together like you’re going to tie it on top and then wrap the floss around your fingers and pull. You should get a perfect slice of the roll each time.
- Cut 12 rolls and place them in the prepared tin as you go, they tend to stick to whatever you are cutting them on if you don’t.
- Butter a piece of plastic wrap and place it butter side down on the rolls, but don’t try to tighten it down. Just leave it loose. Then use more plastic wrap to loosely cover the rolls pan and all (airtight but not tight against the rolls).
- Place the rolls in the refrigerator for 8 to 12 hours.
- When you are ready to cook the rolls, remove all the plastic wrap and place the pan in the cold oven. Don’t panic if they don’t look like they rose a lot, they will rise more in the oven. Set the oven to 375f and leave them for 30 minutes.
- As soon as you remove the rolls from the oven, snip the corner of the bag the icing is in and pipe it all over the rolls while they are still hot.
- Serve immediately or let cool and serve at room temperature (or any temperature in-between!). These can be gently warmed in the microwave individually IF there are leftovers.
Makes 12 large rolls – Best eaten on the day they are made but will keep for up to 3 days.
Facebook Comments
Other Posts You Might Like...
Instant Pot + Sticky Rice
I got an instant pot! I've been using pressure cookers for 30 years, but this is so much easier...
I got an instant pot! I've been using pressure cookers for 30 years, but this is so much easier...
Slow Cooker "BBQ" Chicken
Yes, those are quotations around BBQ in the title. No, this recipe doesn't actually call for coo...
Yes, those are quotations around BBQ in the title. No, this recipe doesn't actually call for coo...
Garlic & Herb Cheese Spread (Like Rondele but better!)
This stuff makes great holiday hors-d'oeuvres. Served with crackers or as the dip in a crudites ...
This stuff makes great holiday hors-d'oeuvres. Served with crackers or as the dip in a crudites ...