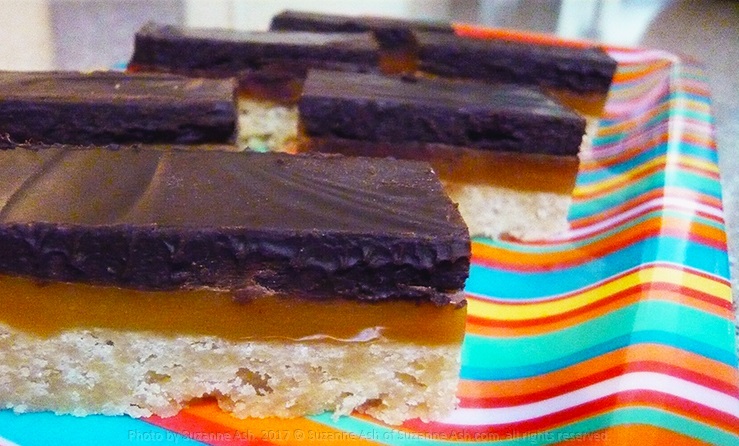
Pronounced “foe-wix”, you know, like fake twix? These are so easy to make. Really, the hardest part about this recipe is unwrapping all those caramels. Yes, I use store-bought caramels. You could make your own, there are loads of recipes out there but I like being able to just nuke’em and not fuss around with candy thermometers. This recipe makes a nice large batch too, so with Halloween coming up next month you could wrap them in wax paper and use my –> CANDY BANDS <– from last year to make them look more festive. Wouldn’t that would be awesome for a party?
Ingredients
- 1 cup (2 sticks) salted butter, softened
- 2/3 cup white granulated sugar
- 2 & 1/2 cups all-purpose flour
- 1 tsp vanilla extract
- 30 caramel candies, unwrapped
- 12 oz semi-sweet chocolate, chopped
Instructions
- Preheat the oven to 350f, and line an 8″x8″ baking pan with parchment paper. Let the parchment hang over a little so it’s easy to pull the whole thing out.
- In a large mixing bowl, use a hand mixer to beat the butter, sugar, and vanilla until light and fluffy (about 3 minutes). Add the flour and beat just until you get a crumb-like texture. Then, press the crumb mixture evenly over the bottom (not up the sides) of the prepared pan. Use a fork to poke holes all over the crust before baking.
- Bake in the middle of the preheated oven until golden brown, about 45 to 50 minutes. Cool in the pan on a cooling rack for half an hour.
- Place the caramels in a large heat-proof bowl or measuring jug and microwave on high in 30-second bursts, stirring in-between, until completely melted (this takes about 2 minutes in my 1000 watt microwave). Pour evenly over the base, and smooth out to the edges if needed. Refrigerate for 20 minutes.
- While the caramel layer is chilling, place the chopped chocolate in a large heat-proof bowl or measuring jug and microwave on high in 30-second bursts, whisking in-between, until completely melted (this takes about 1.5 minutes in my 1000 watt microwave). Pour evenly over the caramel layer, smooth out to the edges, and tap the bottom of the pan gently but firmly a few times on a flat surface. Refrigerate for 30 minutes, or until the chocolate layer is solid.
- To make cutting easier, bring to room temperature before cutting. For cleaner cuts, dip a very sharp knife in hot water, wipe dry/clean in-between each cut.
Makes 32 1″x2″ bars ~OR~ just cut in half to make two 4″x8″ fun size bars
Notes
- Store in an airtight container at room temperature for up to a week. In the fridge for two weeks, and in the freezer for up to 3 months. Warm/defrost to room temperature before serving, unless you like to eat them cold/frozen.
- You don’t need to, but you can individually wrap these in parchment or wax paper, or just put a layer of parchment or wax paper in-between layers to help keep them from sticking together.
Facebook Comments
Other Posts You Might Like...
Chickpea Burger
These are not traditional falafels, but they are "ish". I think these go really well with sweet ...
Air Fryer French Toast
This is such a simple and convenient way to make this. Very tasty too! I just love my air fryer...
Zucchini Taco Boats
Even though it's "diet" it's still a delicious easy to make dinner that gives you a lovely taco ...
