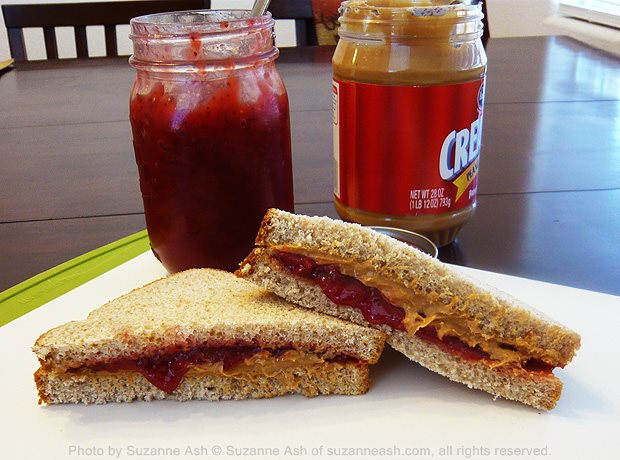
I remember when it was ok for kids to have PB&J sandwiches for lunch at school and I find it hard to imagine my school years without them. Though I have never tried it, I sometimes think about making a PB&J and placing it in a paper bag and leaving it in a hot room or (even better?) a metal box in the sun for 4 hours to try and get that school lunch taste I crave now and then. Though I doubt I will ever really go through with this “experiment” as I am certain that it won’t be anything more than a melted mess that was never going to live up to the memory of the sandwiches of my school years.
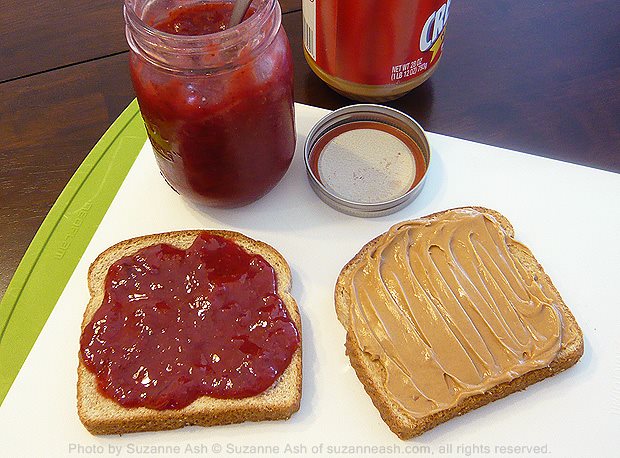
The jams and jellies of my childhood were always very sweet, and as a child, I loved the sugary sweetness of them and the smoother they were the better. As an adult, I prefer a more chunky texture and a stronger more natural fruit flavor, perhaps even a bit of tanginess. This particular jam is not overly sweet, in fact, it taste a lot like more like strawberries then the the majority of high end but still reasonably priced/affordable store bought jams for around the same cost of the ingredients.
I like to vary the flavor of this jam by using different juices or vinegars, with the balsamic version being my very favorite. My granddaughter (age 6) also prefers the balsamic version. However, my husband doesn’t like it as much as when it is made with lemon juice.
Ingredients
- 2 lbs/900g strawberries (weight before hulling & cutting)
- 1c/250g white granulated sugar
- 1 tsp butter or margarine
- 2 tsp lemon juice OR lime juice OR balsamic vinegar OR apple cider vinegar
- 1 clean half pint glass jar with tight fitting lid
Instructions
- Rinse and hull strawberries, cut in half and place in a 2 quart (2 ltr) saucepan.
- Add the sugar and stir well to combine and then place over medium high heat. Bring to a boil stirring frequently.
- As soon as the mixture boils, reduce the heat so that it is only at a good simmer. Very carefully place the butter in the center of the mixture and don’t stir it in.
- Let simmer for 45 minutes or until your desired thickness. Stirring every 10 to 15 minutes.
- Once it has reached your desired thickness, remove the pan from the stove and turn off the heat. Immediately stir in the juice or vinegar.
IMPORTANT! This stuff is molten freakin lava and has the potential to send you to the emergency room so be careful!
After the juice or vinegar is mixed in, carefully pour into the prepared jar and put on the lid. Let cool for 6 to 8 hours, or until at room temperature. See safety tips below!
Makes about 1 3/4 cups, keeps in the fridge for up to a month
Safety Tips
- Cook on a back burner and make sure the handle of the pan is turned in so no one can bump or knock it
- Make sure kids and pets are occupied away from the kitchen, this isn’t a project for kids (or pets, unless your kids or your pets are made of strawberries)
- Don’t try to taste the jam out of the pot or the jar before it’s ready
- Use pot holders whenever you handle the jarred jam, until it is cooled completely
- Don’t rinse the hot jar if you spill down the side while filling it, wait until it is cooled completely or it may explode
- Don’t put the hot jar in the fridge to try and speed up the cooling, just be patient and wait or it may explode
Notes
- Do not try to make a double batch of jam with this recipe, it is only for making the exact amount specified.
- This is a loose jam, it is not meant to set hard.
- You can use frozen strawberries if you thaw them first.
- The 99¢ and/or Dollar Tree stores sell pint size mason jars, that is what I used (in the pictures). The jam fits
- perfectly in one jar with just the right amount of space between it and the lid.